Page 1 of 1
Preparing Timeline
Posted: Sat Jan 31, 2009 5:51 am
by deltagal
Hi there,
Let me say, I REALLY like the way this activity is shaping up. It is so pleasing to look at. BUT I've been looking ahead at the assignments for the timeline in Preparing and I'm wondering if we're doing it correctly. I'm having a little difficulty visualizing what it is going to look like. Is there a picture of one somewhere that I could see. We're using the accordion-fold that we can slip in our notebooks.
Thanks a bunch.
Re: Preparing Timeline
Posted: Sat Jan 31, 2009 10:39 am
by my3sons
Hi Florence!
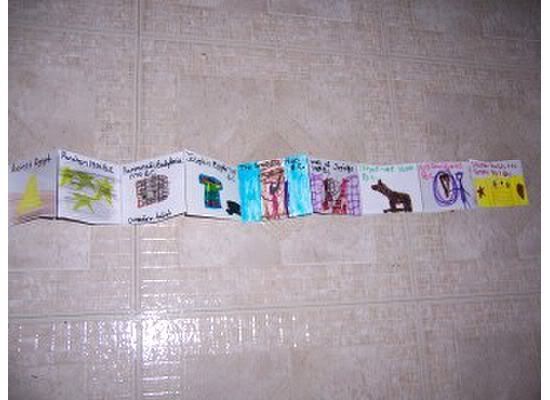
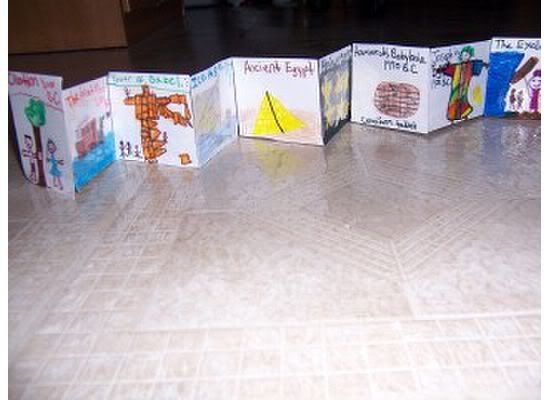
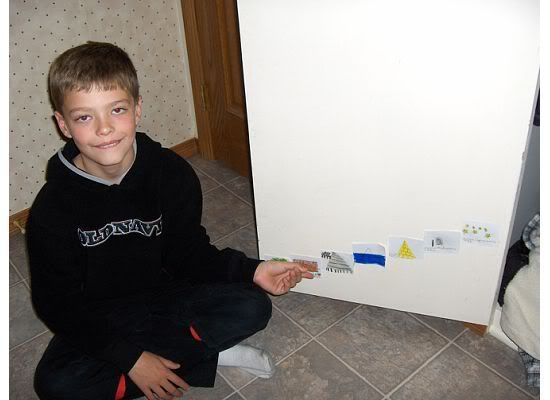
I have some pictures that might help. We're doing the option of taping the timeline on a door (and I need to take another picture because our timeline has grown significantly since this picture

). The other 2 pics are of the other option of making an accordian book. HTH!
In Christ,
Julie
You can click on these to see them larger.
Re: Preparing Timeline
Posted: Sat Jan 31, 2009 3:08 pm
by deltagal
Woops! We really must be on the wrong track. Let me describe what we're doing and see if it in anyway is going to turn out okay. We taped six 8 1/2x 11 inch pieces of card stock together and folded them in accordion style. The top piece has "Timeline", the child's name and date. Then when you open it on the first panel of the six are spaces for 4 rows of 3 cards each. We have only done the bottom row, so far, so it is full and at some point as instructed we'll begin adding the next row. We're currently adding cards to the second panel bottom row. We taped six pieces together, so we would have room for 18 cards on one of the rows, as mentioned in the HOD guides. Make sense?

Re: Preparing Timeline
Posted: Sun Feb 01, 2009 3:56 pm
by my3sons
deltagal wrote:Woops! We really must be on the wrong track. Let me describe what we're doing and see if it in anyway is going to turn out okay. We taped six 8 1/2x 11 inch pieces of card stock together and folded them in accordion style. The top piece has "Timeline", the child's name and date. Then when you open it on the first panel of the six are spaces for 4 rows of 3 cards each. We have only done the bottom row, so far, so it is full and at some point as instructed we'll begin adding the next row. We're currently adding cards to the second panel bottom row. We taped six pieces together, so we would have room for 18 cards on one of the rows, as mentioned in the HOD guides. Make sense?
I think I get what you are saying, and I think that will work too.

You still have rows going in order chronologically, right? As long as you've got that, you're in for smooth sailing!
In Christ,
Julie


